

GETTING STARTED WITH STUD.IO
NOTE: New version of the guide HERE.
Stud.io is a FREE digital lego construction program by Bricklink that lets you digitally build Lego/Bionicle models. You also don’t need to be an expert in 3D programs either, as Stud.io is fairly intuitive and user-friendly. This guide will aim to get you started with using Stud.io, using the part packs, and addressing common questions. Please note that this is a guide for Windows users - most tips will apply here to Mac as well, but some specifics may vary!
If you have any suggestions on improving this new guide or have any questions not answered by the FAQ please contact us at bioniclerebuilt@gmail.com. Or bother us on reddit, that works too.
Introduction
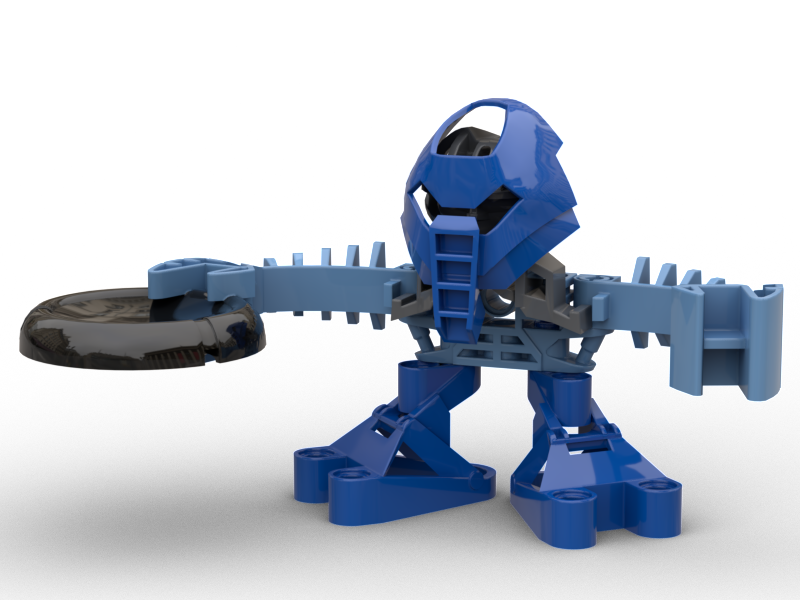
Stud.io is a great tool that can help you make awesome stuff like this, this, or even this! But just so you’re aware, Stud.io isn’t the only digital building solution out there. Other options include:
-
Lego Digital Designer
-
Mecabricks
-
LDraw software suite
They all have their pros and cons, but we found Stud.io to be the best out of all of them.
If you haven't already, first grab the download: https://www.bricklink.com/v3/studio/download.page
Part Packs
While Stud.io provides some Bionicle & Hero Factory pieces in it's default library, it still lacks a significant amount to create anything substantial. Because of this, a number of members in the community took it upon themselves to 3D model parts & masks themselves and provide FREE to the public! The packs are as follows:
-
The GalvaPack
-
Contains custom parts & masks
-
-
The KhingK Pack
-
Contains custom parts & masks
-
-
The Biopack
-
Contains official parts & masks
-
-
Thannus' Bamboo & Kanoka Disk Pack
-
Kanoka Disks:
Beyond these part packs, there are still other creators out there that make their own individual parts (such as on Thingiverse.com). Their work may or may not be included in future pack updates, so download individual models at your own discretion to avoid installing duplicates.
-Installation instructions-
Each pack contains a README file containing installation instructions. Please read through that carefully and any other documentation provided by the creator before attempting to install the pack.
In order to delete installed parts, simply navigate to the Custom Parts palette, right click the part, and select delete. You can also navigate to where the parts are installed on your computer (mentioned in the README file of the packs above) and delete the whole folder.
If you encounter any problems with any of the packs or parts, please check the FAQ below first or contact the original pack creators. For instructions on installing custom models outside of the park packs, please refer to the very end of this guide.
The method of installation for these will vary depending on how the creator provides them.
Setup
Before you start any building, here are some recommended settings to make your life a bit easier with Stud.io:
-Ground Elevation Adjustment-
Go to Edit > Preferences, and in the General tab make sure Ground Elevation is unchecked. This prevents the “ground” from automatically raising or lowering to match the pieces in your scene, so you don’t end up having pieces all over the place.

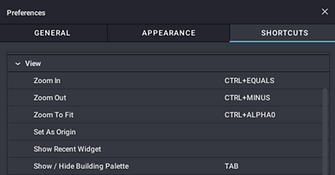
-Show/hide Building Palette-
Again under Edit > Preferences, go to the Shortcuts tab. Scroll to “Show/Hide Building Palette” and give it a shortcut key of your choosing. This way you can just drag the Building Palette all the way down to give more room for the scene, and just toggle show/hide with your shortcut key.
Beginning Building
Building is actually quite simple, all you have to do is drag & drop pieces from your Building Palette into your scene! If you have snap turned on, pieces will automatically connect together where they can.

On the left of the building palette are lists of categories you can scroll through (and even favorite). The "Shapes" and "BL Categories" are just two different categorization systems for Stud.io's part library.
On the top left are Palettes, which are ways to further organize parts.
- Master: Contains all of Stud.io's parts
- New Parts: When Stud.io updates and adds new pieces, only those will be shown in here
- Custom Parts: Parts imported through PartsDesigner or manually imported (such as the parts packs) will be shown in here
- Custom Palettes: you can make your own palettes that contain certain pieces, such as commonly used. Great for organization.
-Connecting Parts-
To connect parts, simply drag and drop pieces to fit together! You can also use the “Connect” tool, which helps with initial precision (example pictured to the right). Each piece has a number of connection points, and you can connect point-to-point using the “Connect” tool. If you’re having part connection issues, check the FAQ for possible solutions.
-Precision Movement-
There are 3 methods to move parts with more precision:
1: WASD stepping
When a part is selected, you can press your W,A,S, and D keys to nudge that piece up, down, left, and right respectively (relative to your camera direction in the scene). At the top of the window under "Grid", you can adjust the distance of the nudge (these can be assigned to hotkeys for ease of access).
2: Movement handles
When a part is selected, a wrench icon appears over the part. Mousing over it shows two more icons, the first for Rotation (explained below) and the second for Translation. Clicking the Translation icon reveals movement handles for the X, Y and Z axes that can be clicked and dragged to a desired location.
3: Location Values
In addition to the movement handles, coordinates are also shown that can be manually edited if clicked on. This allows you to precisely specify a coordinate location of the part (values are measured from the yellow cube core).


-Rotation-
For quick and easy rotations, a selected part can be rotated via the arrow keys in 90-degree intervals. For more precision, clicking the Rotation icon as mentioned above will reveal the rotation handles (or shortcut key "r"). Clicking and dragging any handle will show a wheel with 5-degree steps along it's rim. Keeping the cursor inside the wheel will make the rotation snap to these steps, but dragging it outside will let it rotate freely.
-Submodels-
Submodels are a great way to group pieces together and act as one giant piece (such as a body, arm, etc). Simply hold Left Ctrl and click the pieces you want (or click & drag), then click “Create into submodel” at the bottom right. Submodels are useful for posing your finished creations as well, and are necessary for building instructions in the instruction maker.
Note that if you copy and paste submodels, editing one submodel will also affect the other submodels unless you manually unlink them (click on submodel, and select "unlink submodel" at the bottom right).
Rendering
Now that you've constructed your figure, it's time to render it out! Rendering is essentially the process of your computer generating a photo-realistic image of your figure with fancy lighting and whatnot. There are a lot of different settings that go into a render that can produce a wide variety of results, so you may have to experiment a bit to find out what you like best.
Stud.io has 2 different render engines - the Photorealistic renderer (a modified Cycles engine), and POV-Ray. Most of this guide will be focusing on the Photorealistic renderer.
-Render Quality-
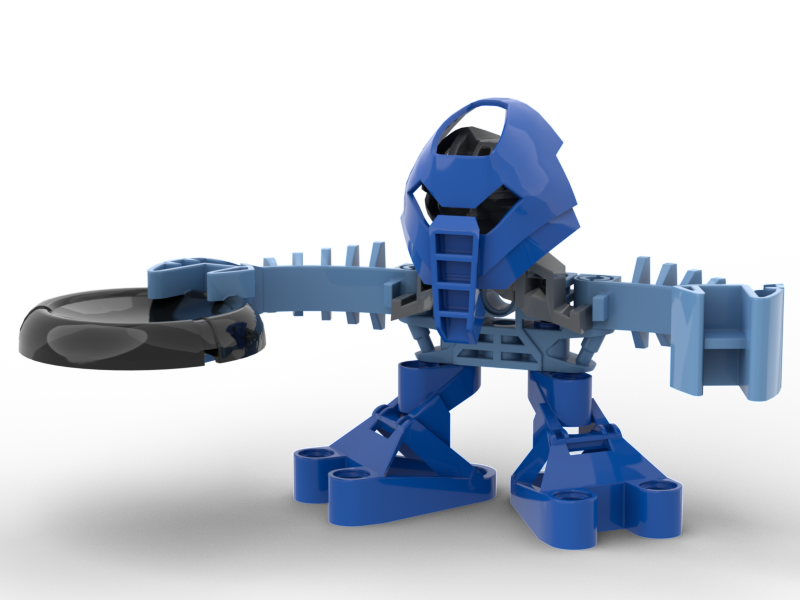
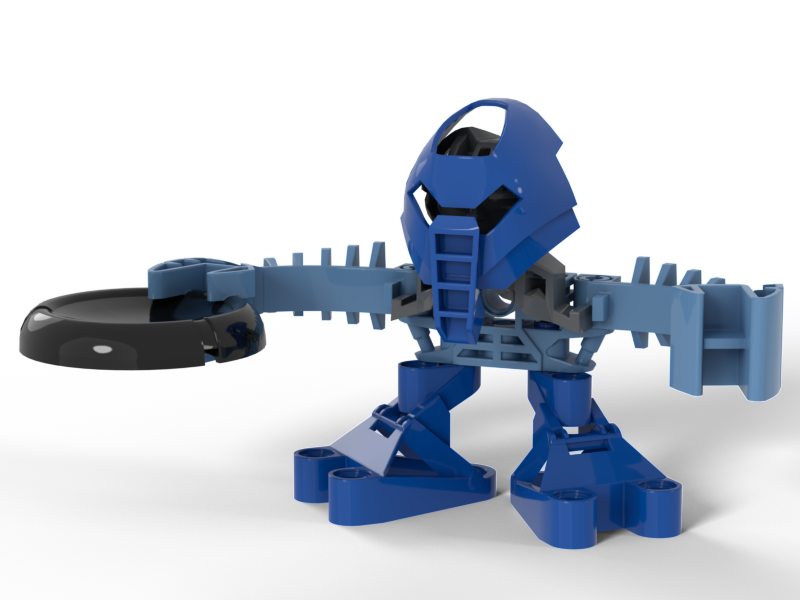
The “Render Quality” setting determines how much processing the renderer will do on your image. The higher the quality, the more realistic the render will look, but each increase will also make your image take longer to render. If you’re not sure where to start, start with Medium and High, as while Very High does have a benefit, it offers diminishing returns for the amount of processing power and time the image will take to render. For example, the following Macku's below from left to right have render qualities of Medium, High, and Very High. Click the images to view larger versions.


-Background-
There are two background options, Solid Color and Transparent. The Solid Color option allows you to pick a single solid color for the background of your render, and the Transparent option allows for the render to be a transparent image with no background. Transparency is only supported in .png file formats.
-Lighting-
The light settings in Stud.io have a lot of options, and each of the five options have differing results. Much of the light settings produce different results with different input settings, so specific information may not hold true for your renders. For a more broad overview of the options, Playwell Bricks on Youtube offers a helpful guide! [https://www.youtube.com/watch?v=0rgtbGK5TPM]
In general however, here are what the 5 different lighting types look like: (from left to right - dawn, mechanic, piazza, asteroid, building. Click the images to view larger vesrions.)


-Camera Settings-
Much like how the camera is controlled in Stud.io’s workspace, the camera can be manipulated for a render in the preview window. For more fine control, you can edit the coordinates and the field of view, which can drastically change the look of your model - but if you’re not sure, starting with the default value of 15 is usually sufficient.
And after you render your model, why not spruce it up a bit? with a .png render, you could add a background perhaps! Maybe throw in some lighting & coloring adjustments, Photoshop effects, the possibilities are as much as you can imagine. And if you think it looks bad, don't be discouraged! Content creation is very much a process of iteration, you just have to try again and again until you find something you're satisfied with.
Instruction Maker
After you've built your model, you can also create an instruction booklet for it right in Stud.io! The process is a little more complicated however, so please watch this video to learn more.
F.A.Q.
Confused? So are we! Hopefully less so, search for yer question laddie
1. Some Pieces aren't snapping together!
First, make sure “Snap” is enabled in your toolbar.
Secondly, try using the “Connect” tool - it allows for more precise connection of pieces, and can help you diagnose if something goes wrong. Note though, that sometimes the "Connect" tool doesn't always snap to the intended position you want it to. It will however always snap to the unit grid, so even if the connection is offset you can just use WASD stepping to shift it in place.
Third, It’s possible the connectivity of the piece is erroneous or broken. You can check this by opening Part Designer and importing that piece from the parts list, then pressing Tab to check connectivity.
-
If the part is part of Stud.io's defaut library, you can wait for their next update to fix it
-
If the part is a custom piece, you can contact the original creator to notify them
-
If you don't want to wait for updates, you can fix it yourself in PartDesigner and export it to Stud.io as a custom piece.
2. Some pieces aren't appearing in my Custom Parts menu!
For some reason, some parts have issues with Stud.io’s automatic LOD (Level of Detail) system that helps to improve performance. To fix this, look in the “Edit” header in the top of the program, and then select “Preferences.” In the “Appearance” menu, make sure the “Render Quality” slider is turned all the way to the right - that way, everything will render correctly.
Additionally, if you have lots of custom parts installed it may take a minute or so for all the parts to load, depending on your computer.
3. Rotation doesn't work!
Sometimes when you try and rotate an object, the wheel will spaz and lock up, not following your mouse. Simply just keep changing your viewport position until this doesn't happen anymore. This happens likely due to a bug.
Advanced: Importing 3D models
Coming Soon. But if you don't want to wait, you can take a look at the original guide which goes through it.
Guide last updated September 6, 2020